


Are you tired of cluttered surfaces but don’t want to compromise on style? Floating shelve might just be the answer you’re searching for! In this guide, we’ll break down the installation process into five straightforward steps, making it accessible for everyone — even if you’re a DIY novice. By the end, you’ll have the confidence to enhance your living space with beautifully mounted floating shelves that not only save space but also showcase your favorite decor.
Transform Your Space with Shelves
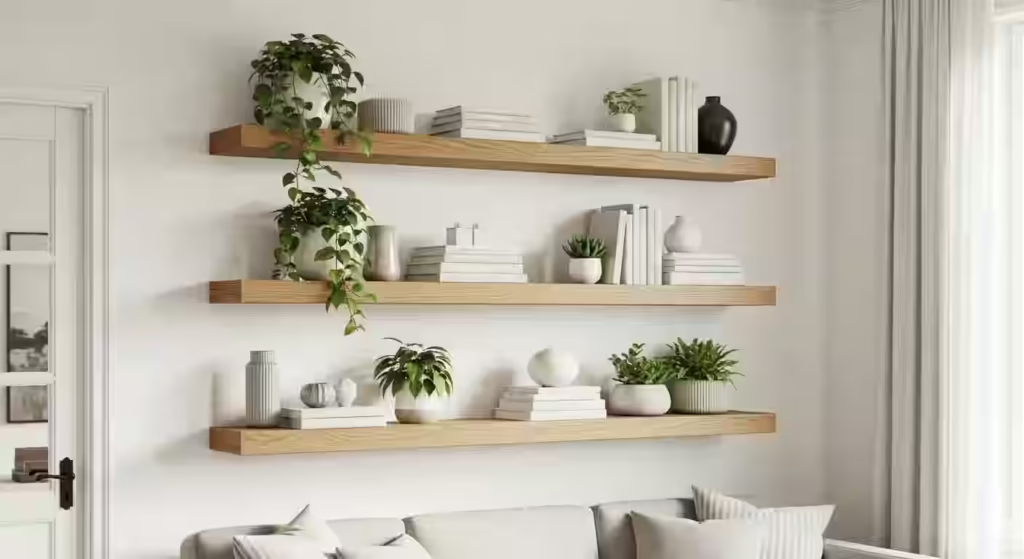
Floating shelves are not just functional; they are a game-changer in home decor. By incorporating these sleek designs into your space, you can create a stunning visual effect that elevates your room’s style without the bulk of traditional shelving. Imagine showcasing your favorite books, plants, or decorative items in a way that draws the eye and compliments your existing décor. The versatility of floating shelves allows you to experiment with different arrangements and styles, making them perfect for any room — from the living room to the bathroom.
Moreover, installing floating shelves can help declutter your surfaces while adding dimension to your walls. By utilizing vertical space, you can create an illusion of height in smaller rooms, making them feel larger and more inviting. Consider mixing materials — wooden shelves paired with metal brackets can provide a rustic yet modern look. With just a few simple steps, you’ll not only transform your space but also unleash your inner designer! So grab those tools, and let’s get started on your journey to a beautifully organized home!
What Are Floating Shelves?
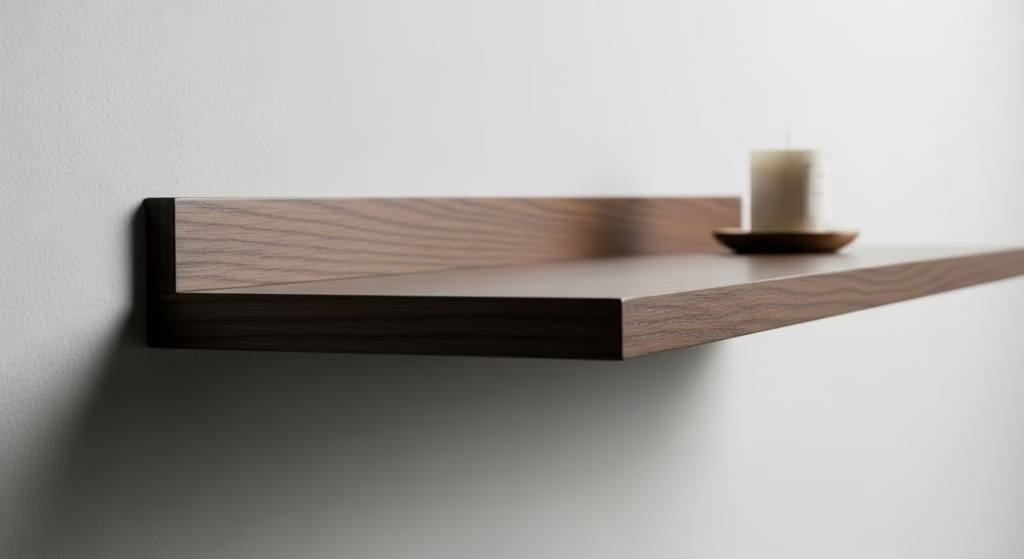
Floating shelves are innovative storage solutions that provide both functionality and aesthetic appeal. Unlike traditional shelves that are supported by brackets or visible hardware, floating shelves appear to float on the wall, creating a sleek, minimalist look. This design allows for an unobstructed view of the wall space, making them perfect for showcasing decorative items, books, or even plants without overwhelming your room’s decor.
One of the most appealing aspects of floating shelves is their versatility. They can be installed in virtually any room — be it the living room, kitchen, or bathroom — and come in various materials, sizes, and styles to match any design theme. Whether you prefer rustic wood for a cozy vibe or sleek glass for a modern touch, floating shelves can elevate your home’s aesthetic while maximizing vertical space. Plus, they encourage creativity; consider using them to create an eye-catching display or to organize your favorite items in a way that reflects your personality!
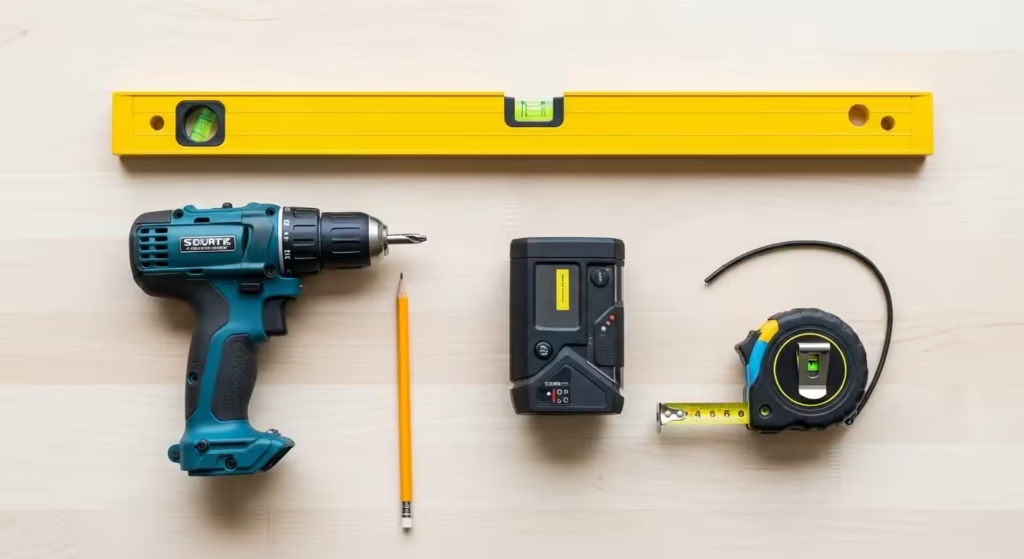
Tools You’ll Need for Installation
To achieve that professional look with your floating shelves, having the right tools on hand is essential. Start with a level to ensure your shelves are straight; nothing ruins a beautifully styled shelf like a tilt! A power drill is also a must-have, as it makes installation a breeze — especially when securing brackets to the wall. Don’t forget a stud finder; it’s crucial for locating the strongest points in your wall to support the weight of your shelves.
Additionally, having a tape measure handy will help you determine the perfect placement for your shelves. Use a pencil to mark your measurements lightly on the wall, allowing for easy adjustments before making any permanent decisions. Finally, consider keeping a screwdriver set close by; this will allow you to quickly switch between different types of screws as needed. With these tools ready, you’re well-equipped to create an eye-catching display that enhances your space!
Step 1: Choose the Right Location
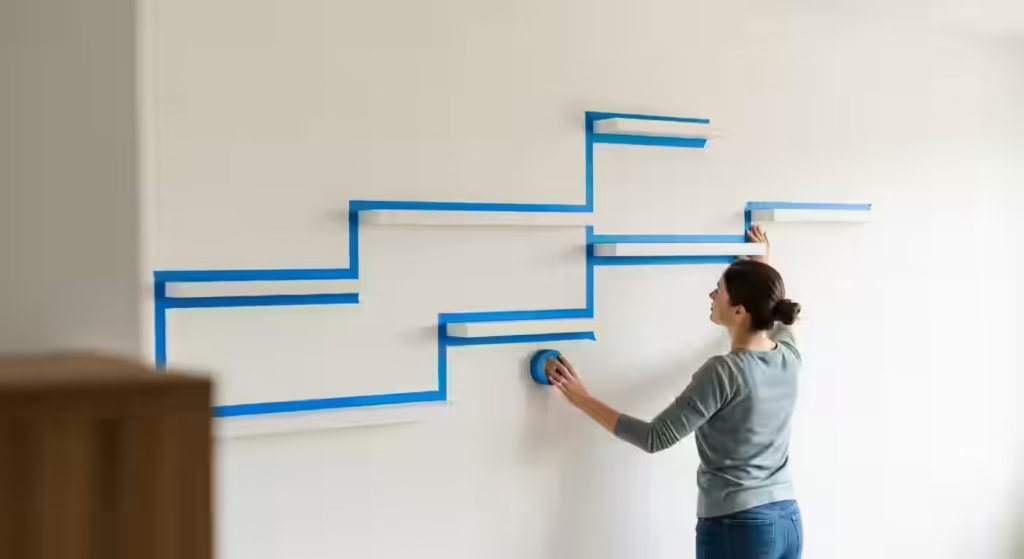
Selecting the perfect spot for your floating shelves is crucial to both functionality and aesthetics. Consider high-traffic areas where you want to display decorative items or practical storage solutions, like your living room or kitchen. Avoid placing shelves in awkward spaces where they might obstruct movement or feel out of place. Instead, think about how the shelves will interact with existing furniture and decor — aim for a harmonious blend that enhances your room’s overall vibe.
To maximize visual impact, try the eye level rule. This means positioning your shelves at eye level, allowing them to draw attention without straining to see what’s on them. If you have children or pets, consider placing them higher up to keep fragile items safe. Additionally, don’t shy away from experimenting with asymmetrical placements for a more modern look. Use painter’s tape to outline your desired shelf dimensions on the wall; this simple trick helps visualize how the shelves will fit into your space before making any permanent decisions.
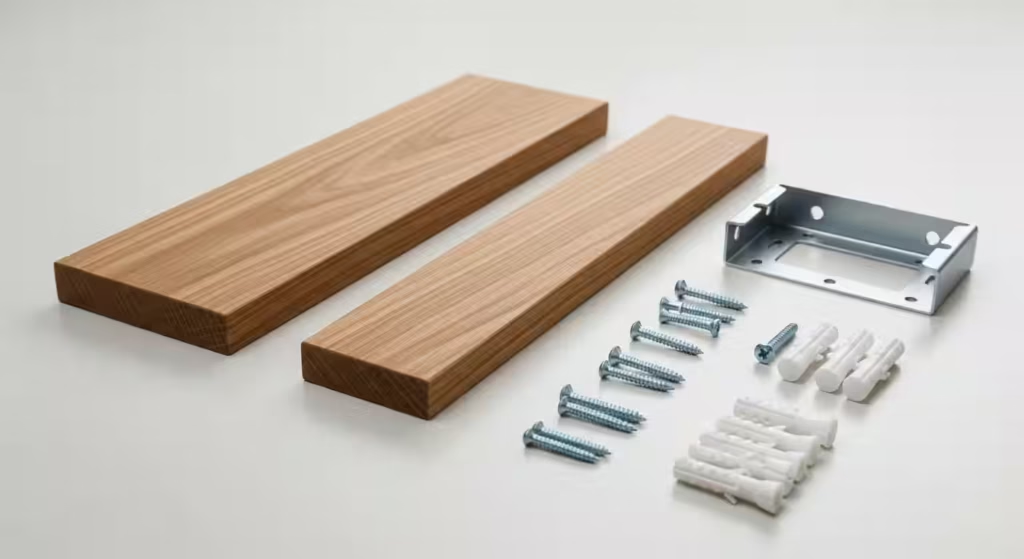
Step 2: Gather Your Materials
Before diving into the installation process, it’s crucial to gather all necessary materials to ensure a smooth experience. Here’s what you’ll need for your floating shelves:
– Shelves: Choose shelves that fit your style — wood, metal, or even glass. Consider the weight they’ll hold and pick a material that can handle it!
– Brackets: These are essential for supporting your shelves. Opt for hidden brackets for a sleek look or decorative ones that can enhance your decor.
– Tools: A drill, level, screwdriver, and measuring tape are must-haves. Don’t forget safety goggles to protect your eyes while working!
Take a moment to organize your workspace. Having everything within reach not only saves time but also sparks creativity as you visualize how the shelves will transform your space. By ensuring you have all these materials ready, you’ll set yourself up for success in achieving that polished, professional look!
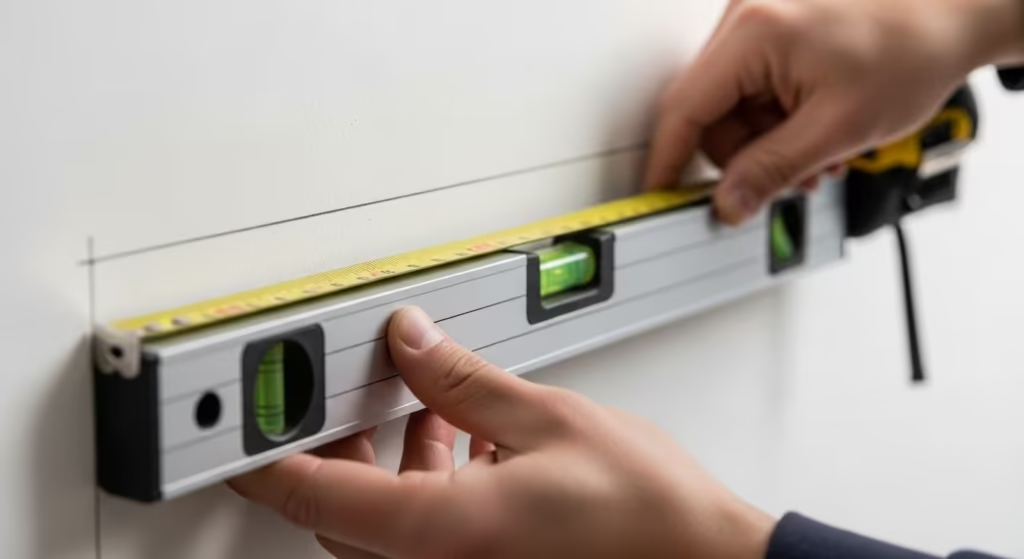
Step 3: Mark and Measure Accurately
Accurate marking and measuring are the backbone of a successful floating shelf installation. Start by using a level to mark where your shelves will hang; this ensures that they are straight and visually appealing. A misaligned shelf can throw off the entire look of your room, so take your time with this step. Use a pencil for light markings that can easily be erased or adjusted if needed.
Next, determine the height at which you want your shelves. A common guideline is to position them at eye level, around 57-60 inches from the floor, but consider your space and decor style. Don’t forget to account for any items you plan to place on the shelves. If you’re displaying books or decorative pieces, ensure there’s enough clearance above them. Once you’ve marked your desired heights and confirmed they’re level, use a measuring tape to double-check distances between shelves if you’re installing multiple units. Accuracy here sets the stage for a polished, professional finish!
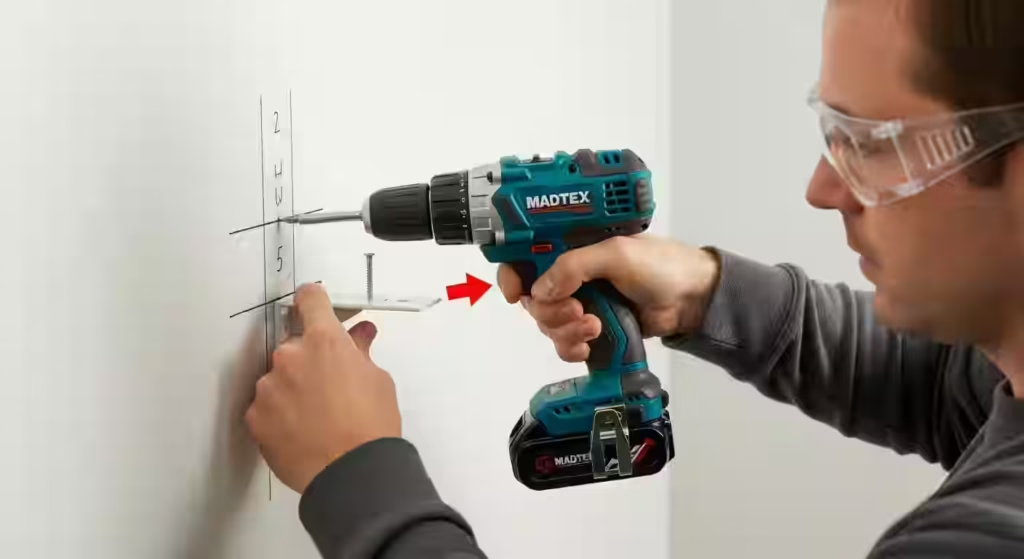
Step 4: Install the Brackets Securely
To ensure your floating shelves are both functional and visually appealing, securely installing the brackets is crucial. Start by holding the bracket against the wall where you plan to place the shelf, ensuring it’s level. Use a pencil to mark the screw holes; this will guide you during installation. For added precision, consider using a stud finder to locate wall studs, as anchoring your brackets into studs provides maximum support and stability.
Next, drill pilot holes at your marked points. This step is essential to prevent the wood from splitting and to make it easier to drive in the screws. If you’re mounting into drywall without hitting a stud, use wall anchors for extra strength. These little devices expand behind the wall, creating a secure grip that can hold your shelf even under weight. Remember to double-check the level before tightening the screws completely; an unlevel shelf can detract from your room’s aesthetic and functionality!
Finally, give each bracket a gentle tug after installation to ensure they’re firmly in place. This extra check can save you from future headaches caused by sagging shelves. With everything secured, you’re now ready to place your shelf on top — transforming your space with style and confidence!
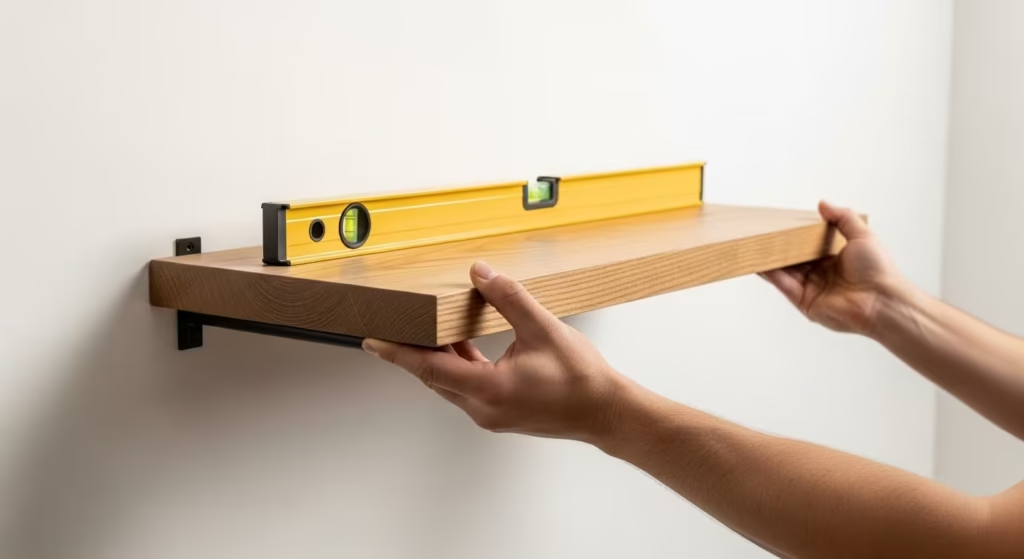
Step 5: Attach the Shelves with Care
Once you have your brackets securely anchored to the wall, it’s time to attach the shelves. Start by lifting the shelf into position, ensuring that it aligns perfectly with the brackets. A gentle nudge can help settle it into place, but be cautious — too much force could lead to damage. If possible, have a friend assist you; an extra pair of hands can make this step smoother and more precise.
Before securing the shelves, take a moment to check for levelness. Using a level tool ensures that your shelves will not only look great but also function well. Once you’re satisfied with the positioning, fasten the screws or bolts through the brackets into the shelves. Be careful not to overtighten, as this could split the wood or warp the material. With everything securely attached, step back and admire your handiwork — you’ve just added a touch of elegance to your space!
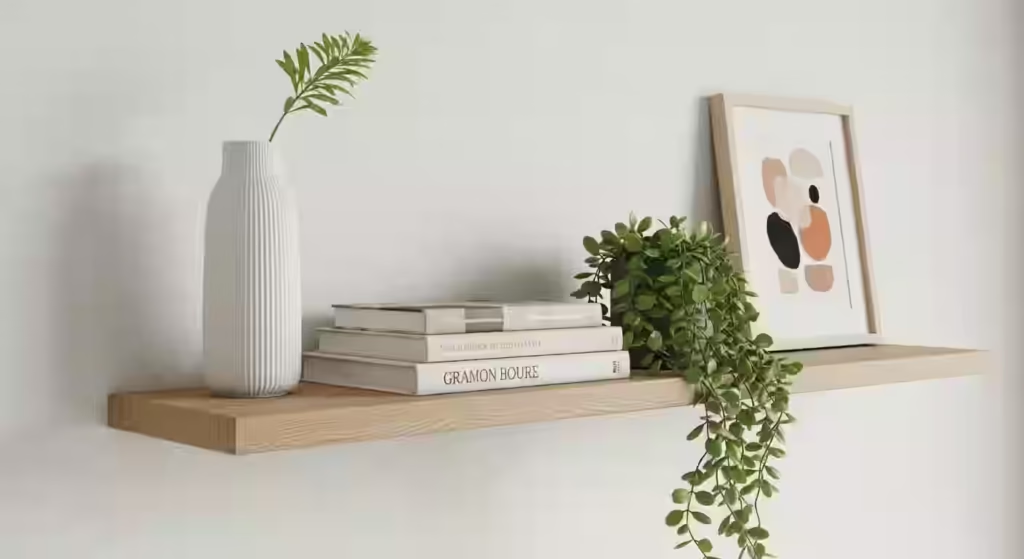
Tips for Styling Your Floating Shelve
When it comes to styling your floating shelves, balance is key. Aim for a mix of height and depth by incorporating items of varying sizes. For example, pair tall books with smaller decorative objects like candles or plants. This creates visual interest and prevents the shelves from looking cluttered.
Another effective technique is to use color as a unifying element. Choose a color palette that complements your room’s decor and stick to it. For instance, if your living space features earthy tones, consider using ceramics or artwork in similar shades to maintain cohesion. Additionally, don’t shy away from personal touches; incorporating framed photos or travel souvenirs can make your shelves feel uniquely yours. Lastly, remember to leave some negative space — this allows each piece to breathe and draws attention to your curated selection!
Enjoy Your New Shelf Style!
Transforming your space with floating shelves is just the beginning — now it’s time to enjoy the stunning results! Take a moment to step back and admire your handiwork. The beauty of floating shelves lies not only in their sleek design but also in their ability to showcase your personality. Consider curating a unique display that reflects your interests, whether it’s a collection of books, travel souvenirs, or vibrant plants. Mixing textures and colors can create a dynamic visual effect that elevates your room’s aesthetic.
Don’t be afraid to change things up! As seasons change or your tastes evolve, feel free to rearrange your shelf decor for a fresh look. Adding seasonal elements like cozy candles in fall or colorful flowers in spring can breathe new life into your space. Plus, rotating your display keeps the eye engaged and ensures that your home remains a true reflection of you. So go ahead — embrace this opportunity for creativity and let your floating shelves tell your story!

