


Ever thought about how a single piece of art can completely transform your living space? Metal wall art offers a unique way to elevate your home decor while showcasing your personal style. In this article, we’ll guide you through the exciting process of creating your own custom metal wall art at home. By the end, you’ll have the skills and confidence to craft stunning pieces that reflect your individuality!
Why Custom Metal Wall Art?
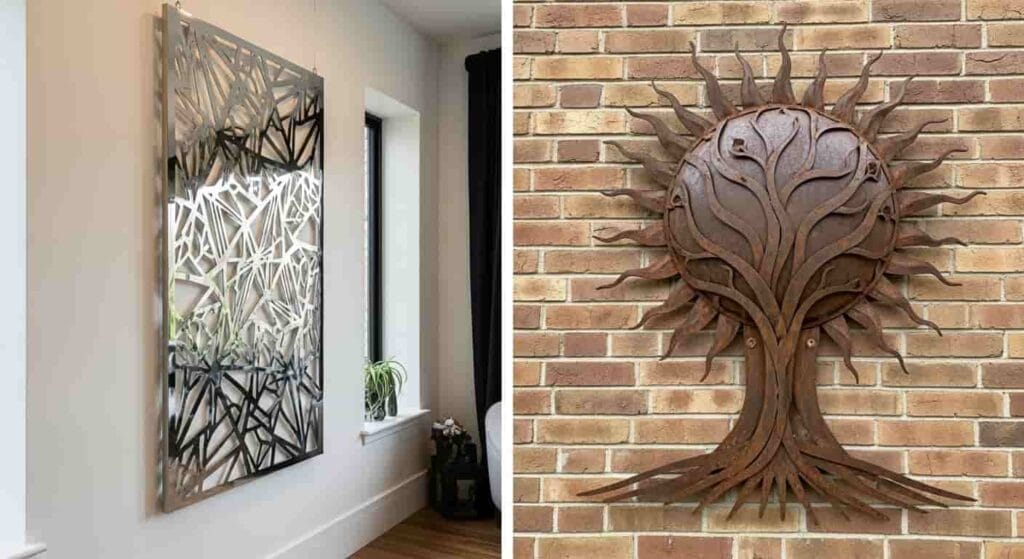
Custom metal wall art transforms your living space into a unique expression of your personality. Unlike traditional art, metal pieces offer a contemporary flair and durability, making them ideal for indoor and outdoor settings. The versatility of metal allows for intricate designs and finishes that can complement any decor style, from industrial chic to modern minimalism.
Creating your own custom piece means you can tailor the design, size, and color to fit perfectly within your home. Whether it’s a family name, a meaningful quote, or an abstract design that sparks joy, this personal touch not only enhances your environment but also tells a story. Plus, crafting your own art can be a rewarding project that adds a sense of accomplishment and pride to your living space.
Materials You’ll Need for Your Project
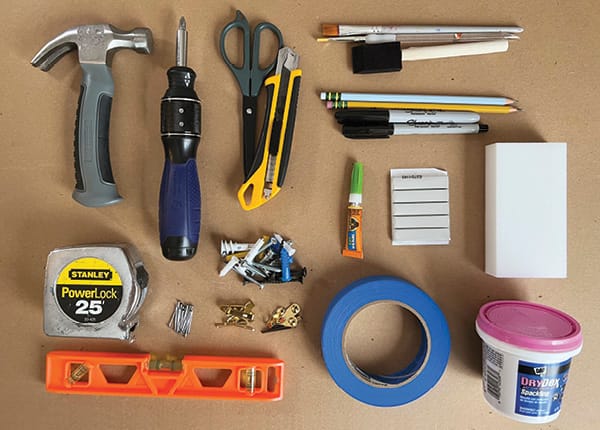
Creating your own custom metal wall art is an exciting venture that allows you to express your unique style. To get started, you’ll need a few essential materials that will set the foundation for your masterpiece. First and foremost, choose a suitable metal sheet — aluminum or steel are great options. Aluminum is lightweight and easy to work with, while steel offers durability and a more industrial vibe. Don’t forget to grab some protective gloves and safety goggles to keep yourself safe during the cutting process!
Next, consider your design tools. A good quality marker or chalk can help you sketch out your ideas directly onto the metal. For cutting, a jigsaw or metal snips will be your best friends, depending on the thickness of your chosen metal. If you’re looking to add intricate details or patterns, a plasma cutter can provide precision that elevates your art. Finally, gather some paint or finish for added flair — spray paints designed for metal can bring your creation to life with vibrant colors!
Tools Required for Metal Art Creation
Creating stunning metal wall art requires the right tools to transform your vision into reality. First on your list should be plasma cutter or torch cutter, which allows for precise cuts through various metal types. If you’re aiming for intricate designs, a Dremel tool with cutting and engraving bits can help you add fine details to your pieces. Don’t overlook the importance of safety gear; protective goggles and gloves are essential to safeguard against sharp edges and flying debris.
Once you’ve got your cutting tools sorted, consider investing in a welding machine if your project involves joining different metal pieces together. For finishing touches, a metal grinder can smooth rough edges, while a sander helps prepare the surface for painting or patina application. Lastly, a sturdy workbench equipped with clamps will provide a stable workspace, allowing you to focus on creativity rather than juggling materials. With these tools in hand, you’re well on your way to crafting unique metal art that truly reflects your style!
Designing Your Unique Wall Art Piece
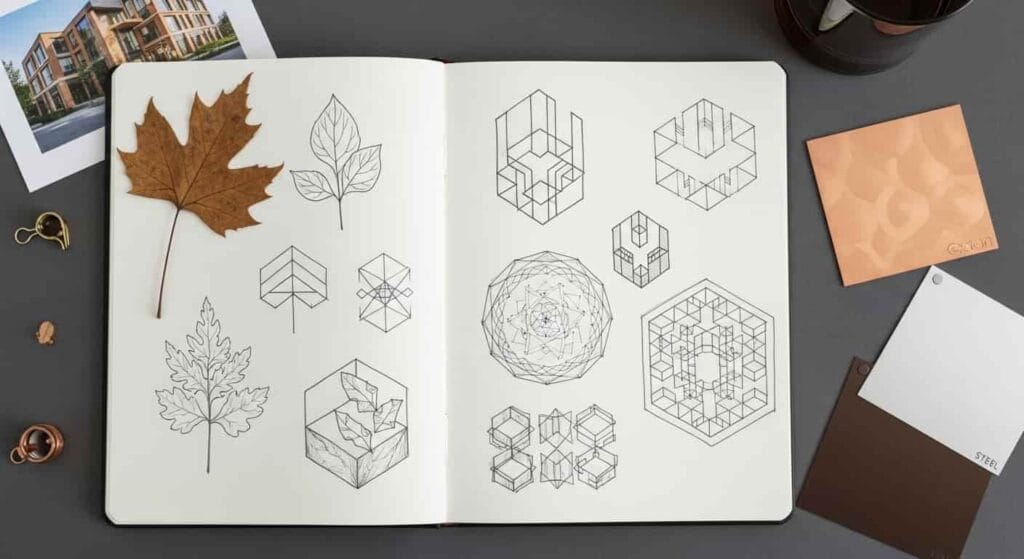
Creating a custom metal wall art piece allows you to express your personality and elevate your home decor. Start by gathering inspiration from various sources — nature, architecture, or even your favorite quotes. Pinterest boards, Instagram feeds, and design magazines can ignite your creativity and help you visualize what resonates with you. Consider the theme or emotion you want your artwork to convey; this will guide your design choices.
Once you have a clear vision, sketch out your ideas. Don’t worry about perfection — this is about exploration! Use simple shapes and lines to draft your design, keeping in mind the size and placement of the piece on your wall. When choosing materials, think about how different metals can impact the overall look; for example, copper lends warmth while stainless steel offers a sleek, modern vibe.
Finally, remember that layering textures can add depth to your art. Combine your metal piece with wood or canvas elements to create an engaging focal point. As you embark on this creative journey, let your imagination run wild, and enjoy the process of transforming your space into a reflection of who you are!
Step-by-Step Guide to Cutting Metal

1. Gather Your Tools:
Start by collecting essential tools such as a metal cutting saw, safety goggles, gloves, and a sturdy work surface. The right equipment ensures both safety and precision, making the process smoother and more enjoyable.
2. Measure and Mark:
Before cutting, carefully measure your metal piece and mark the desired design with a permanent marker or scribe. This step is crucial; accurate measurements help avoid mistakes and waste, allowing your creativity to shine through in every cut.
3. Cutting Technique:
Depending on the thickness of your metal, choose an appropriate cutting method. For thin sheets, tin snips or an angle grinder may suffice. For thicker materials, a plasma cutter or bandsaw offers clean cuts with minimal effort. Always follow the manufacturer’s instructions for best results!
4. Finishing Touches:
Once your pieces are cut, smooth any rough edges with a file or sandpaper to prevent sharp surfaces that could cause injuries. Consider adding a protective coating or paint to enhance durability and aesthetics. Your custom wall art is now ready to be displayed!
By following these steps, you’ll not only master the art of metal cutting but also unleash your creativity, transforming ordinary materials into stunning pieces that reflect your personal style. Happy crafting!
Techniques for Finishing Your Artwork
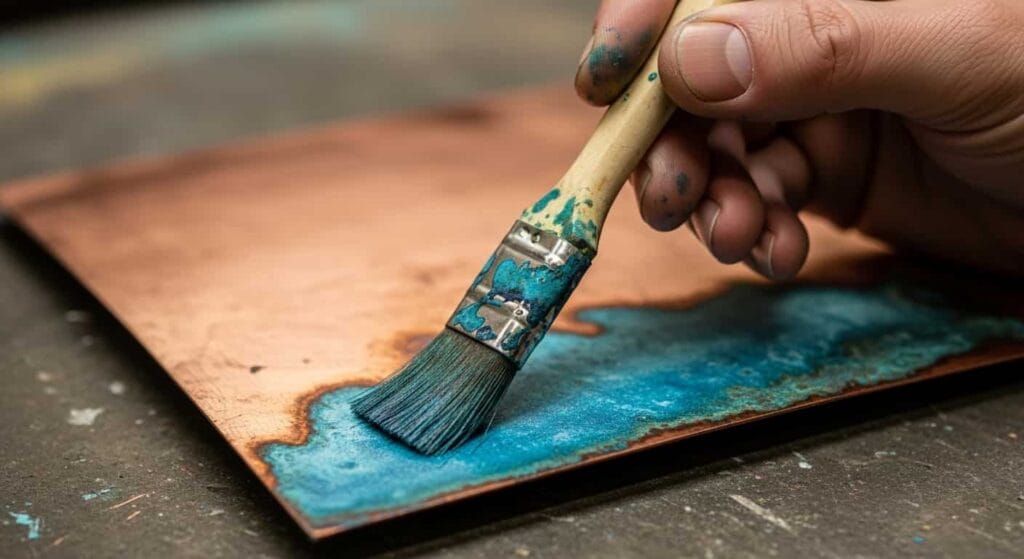
Once you’ve crafted your custom metal wall art, the finishing touches can elevate it from good to extraordinary. Start by considering surface treatments — a clear coat of sealant not only protects your piece from rust but also enhances its shine, adding depth to your colors. For a more dramatic effect, explore patinas or colored finishes ; these can create unique visual textures that draw the eye and highlight intricate details of your design.
Another technique to consider is layering elements. By incorporating different metal thicknesses or combining various materials like wood or glass, you can add dimension and interest to your artwork. Don’t shy away from experimenting with **lighting** either! Positioning your piece near a light source or installing spotlights can dramatically change its appearance, creating shadows and highlights that bring your design to life. Lastly, think about how you’ll mount your artwork — using standoffs can give it a floating effect, making it feel like a part of the space rather than just hanging on the wall. These finishing touches will not only showcase your creativity but also ensure your piece becomes a striking focal point in your home.
Installing Your Metal Wall Art Securely
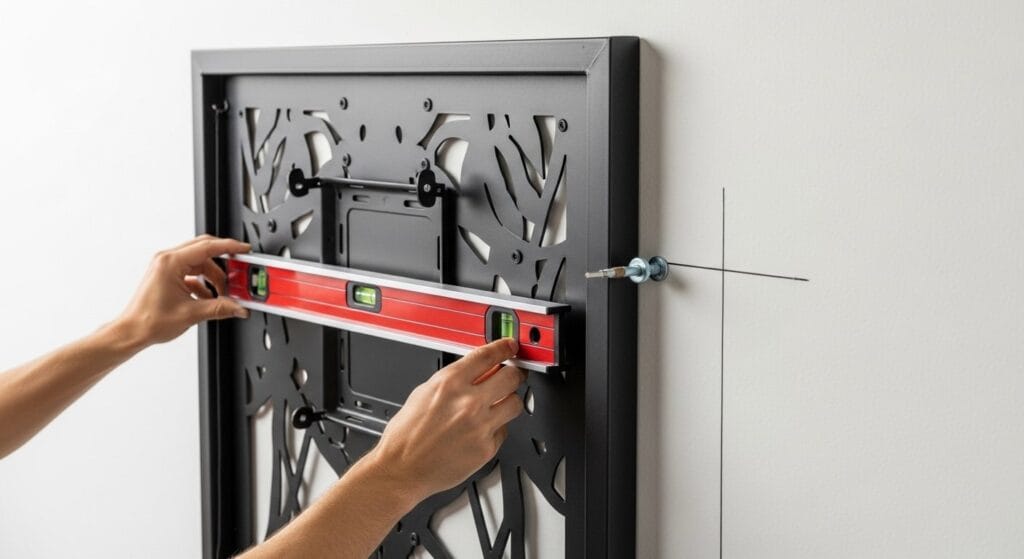
To ensure your custom metal wall art remains a stunning focal point in your home, proper installation is key. Start by selecting the right hardware; for heavier pieces, consider using wall anchors or toggle bolts to provide extra support. This will help distribute the weight evenly and prevent any unfortunate falls. If your artwork has mounting holes, use screws that are appropriately sized for both the artwork and the wall material.
Next, take precise measurements before making any holes. Using a level will ensure that your art hangs straight, enhancing its visual impact. For a more dynamic look, consider arranging multiple pieces together; just be sure to leave enough space between them to avoid a cluttered appearance. A good rule of thumb is to keep 2-4 inches between smaller pieces and 6-12 inches for larger artworks. With these steps, you can transform your wall into a captivating gallery that not only showcases your creativity but also stands the test of time.
Tips for Maintaining Your Metal Art
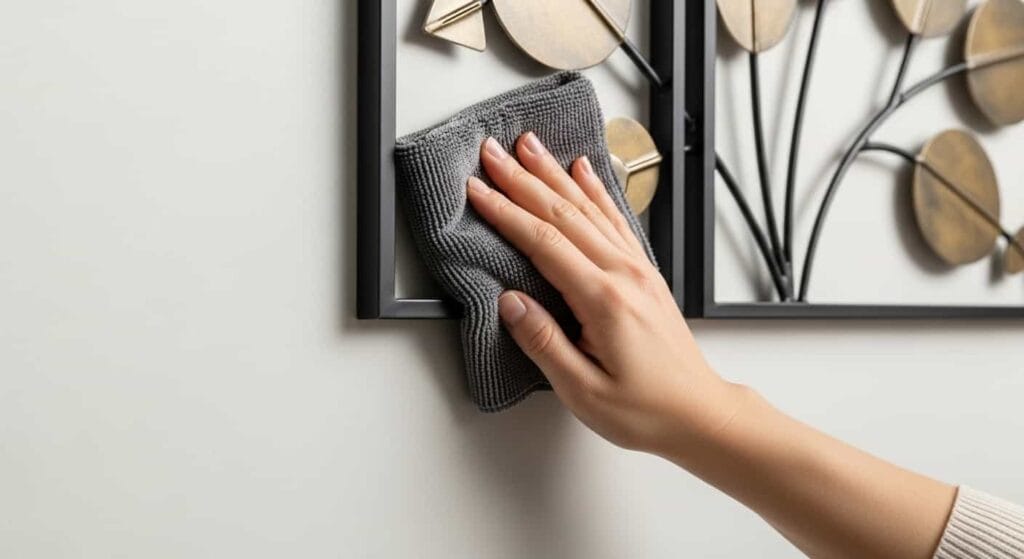
To keep your metal wall art looking stunning, regular maintenance is key! Start by dusting your pieces with a soft, dry cloth to remove any accumulated dirt or debris. This simple step prevents scratches and keeps your artwork vibrant. For outdoor pieces, consider applying a clear protective sealant every couple of years to shield against rust and weather elements.
Another essential tip is to avoid harsh chemicals when cleaning. Instead, use a gentle soap solution and a microfiber cloth to maintain the finish without damaging the surface. If your metal art features intricate designs or textures, a soft brush can help reach those nooks and crannies. Remember, positioning also plays a role; placing your art away from direct sunlight can prevent fading and discoloration. By incorporating these easy maintenance practices, you can ensure your custom metal art remains a captivating focal point in your home for years to come!
Showcasing Your Finished Piece at Home
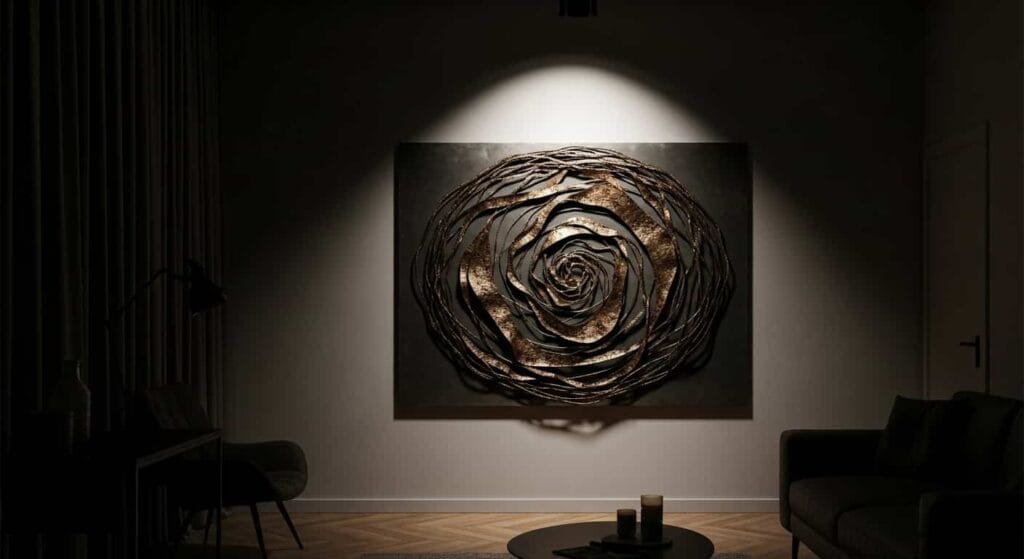
Once your custom metal wall art is complete, it’s time to bring it to life in your space! Start by selecting the perfect location. Consider high-traffic areas like your living room or hallway where your art can capture attention and spark conversation. Ensure the wall color complements your artwork; a neutral backdrop often works best, allowing the intricate details of your metal piece to shine.
Next, think about lighting. Natural light can create beautiful shadows and enhance the textures of your piece during the day, while focused artificial lighting can transform its ambiance at night. Use spotlights or picture lights to draw the eye and highlight its features. Finally, consider surrounding elements — pair your wall art with complementary decor, such as plants or furniture, to create a cohesive look that enhances the overall aesthetic of your home.
Unleash Your Creativity Today!
Imagine transforming your living space into a personal gallery with custom metal wall art that reflects your unique style. Creating your own designs is not just a hobby; it’s a powerful way to express your individuality and enhance your home’s ambiance. Start by brainstorming themes or motifs that resonate with you — nature, abstract patterns, or even inspirational quotes can serve as the foundation for your artwork.
Once you have a concept, gather materials like sheet metal, a plasma cutter, or even simple hand tools to bring your vision to life. Don’t shy away from experimenting; the beauty of art lies in exploration! Use different finishes and colors to add depth and personality to your pieces. Remember, every creation is a step towards refining your skills and discovering new techniques. So, roll up your sleeves and let your imagination run wild — your walls are waiting for a transformation!
FAQs for Creating Your Own Custom Metal Wall Art at Home
What materials do I need to create metal wall art?
To create metal wall art, you’ll typically need:
Metal sheets (aluminum or steel)
Cutting tools(like a plasma cutter or metal shears)
Safety gear(gloves, goggles)
Paint or finish(if desired)
Mounting hardware (to hang your art)
Can I use recycled materials for my metal wall art?
Absolutely! Recycled metal can add a unique touch and is eco-friendly. Just ensure that the materials are clean and safe to work with.
How do I design my metal wall art?
Start by sketching your ideas on paper or using design software. Consider:
Themes (nature, abstract, etc.)
Sizes and shapes
Color schemes
What tools are best for cutting metal?
For beginners, consider using:
Metal shears for thin sheets
Plasma cutters for intricate designs
Jigsaws with metal blades for curves
Always prioritize safety and wear appropriate gear!
Do I need special training to work with metal?
While some experience helps, many projects can be tackled by beginners. Start with simple designs and gradually take on more complex projects as you gain confidence.
How can I hang my metal wall art?
Hanging options include:
D-rings attached to the back
Wire for flexibility
Directly mounting with screws for larger pieces
Ensure it’s secure to avoid accidents!
Can I paint my metal wall art?
Yes! You can use spray paint designed for metal or apply a clear coat for a polished look. Always prepare the surface by cleaning and priming if necessary.
What safety precautions should I take when working with metal?
Always prioritize safety by:
– Wearing gloves and goggles
– Working in a well-ventilated area
– Keeping your workspace organized to prevent accidents
Feel free to explore your creativity and enjoy the process of making your own stunning metal wall art!

