


The kitchen is often considered the heart of the home, where families gather to cook, eat, and create lasting memories. However, a full kitchen renovation can be an overwhelming and expensive undertaking, often costing tens of thousands of dollars and requiring weeks or months of disruption to your daily routine. Fortunately, there are numerous budget-friendly ways to refresh and transform your kitchen without the need for a complete overhaul.
These strategic upgrades can dramatically improve both the functionality and aesthetic appeal of your kitchen while staying within a reasonable budget. Whether you’re looking to increase your home’s value before selling, update an outdated design, or simply create a more enjoyable cooking environment, these seven budget-friendly approaches can deliver impressive results without breaking the bank.
The key to successful budget kitchen upgrades lies in focusing on high-impact changes that provide the maximum visual and functional improvement for your investment. By targeting specific elements such as cabinet finishes, hardware, lighting, and storage solutions, you can achieve a fresh, modern look that rivals expensive renovations at a fraction of the cost.
This comprehensive guide will walk you through seven proven strategies for transforming your kitchen on a budget, providing detailed instructions, cost estimates, and professional tips to ensure your project succeeds. From simple cosmetic updates to more involved DIY projects, these upgrades can be completed over weekends or during your spare time, allowing you to spread the cost and effort over several months if needed.
1. Paint Your Cabinets for Maximum Impact
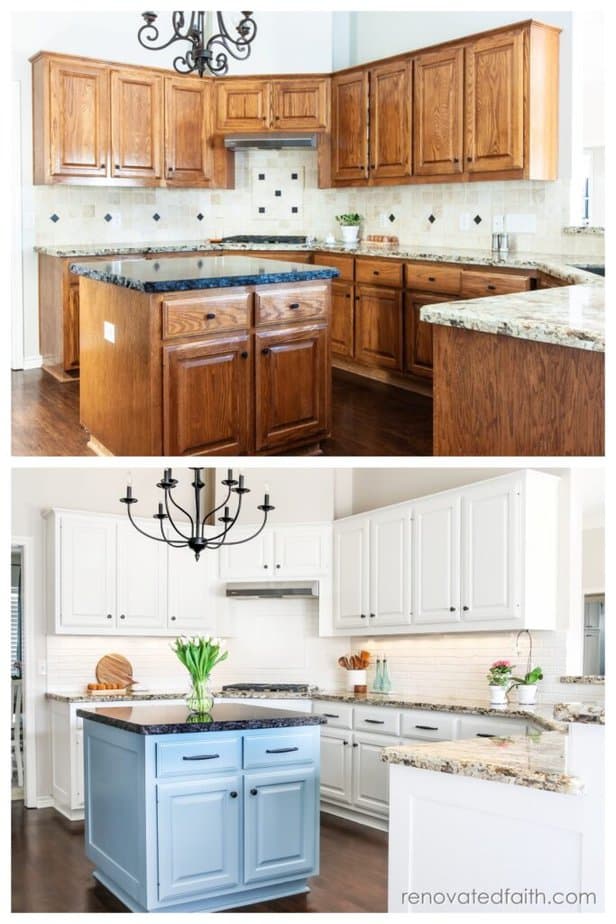
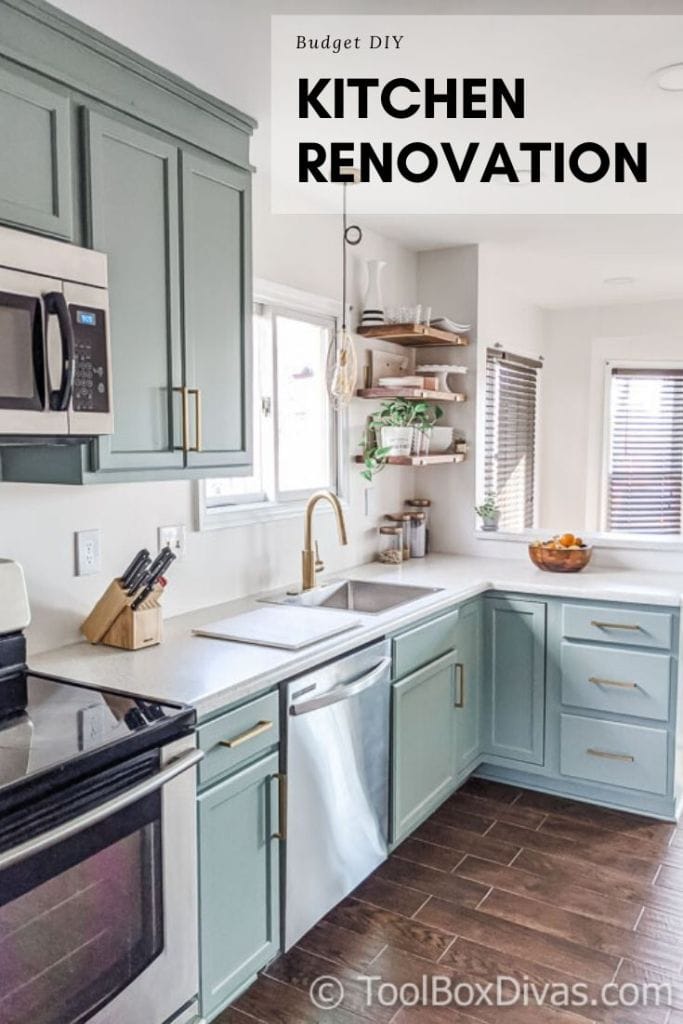
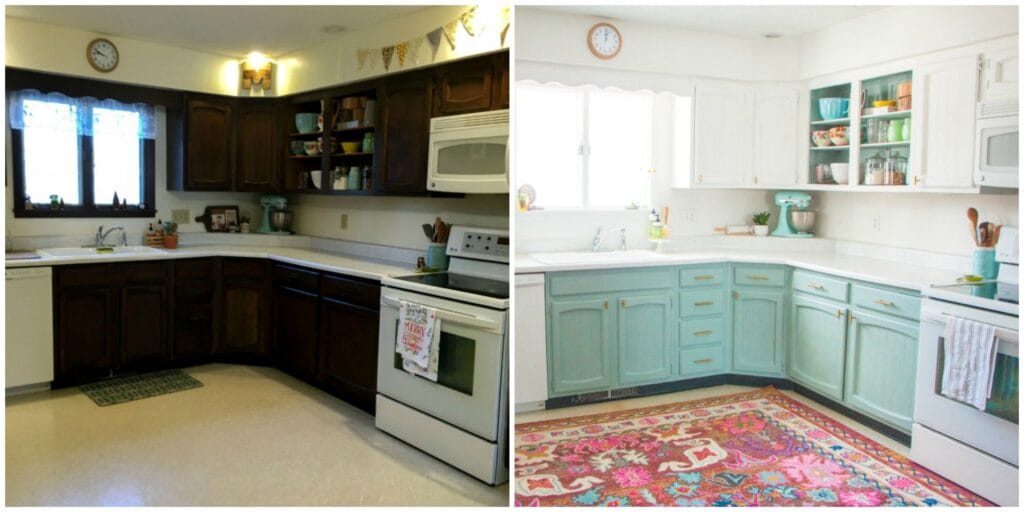
Painting kitchen cabinets is arguably the most transformative and cost-effective upgrade you can make to your kitchen. This single change can completely alter the look and feel of your space, taking it from dated and dark to fresh and modern. Professional cabinet painting can cost thousands of dollars, but with the right preparation and techniques, this is a project that ambitious DIYers can tackle themselves for a fraction of the cost.
Understanding the Investment: The cost of painting cabinets yourself typically ranges from 200to200 to 200to600, depending on the size of your kitchen and the quality of materials you choose. This includes primer, paint, brushes, rollers, sandpaper, and other supplies. Compare this to the 3,000to3,000 to 3,000to8,000 cost of professional cabinet painting or the 15,000to15,000 to 15,000to30,000 cost of cabinet replacement, and the value proposition becomes clear.
Choosing the Right Paint: Not all paints are created equal when it comes to kitchen cabinets. You’ll want to invest in high-quality paint specifically designed for cabinets and trim. Alkyd (oil-based) paints provide the most durable finish but require longer drying times and proper ventilation. High-quality latex paints have improved significantly and offer easier cleanup and faster drying times while still providing excellent durability.
Popular cabinet paint colors include classic white, which creates a timeless, clean look that makes kitchens appear larger and brighter. Soft grays offer a contemporary feel while remaining neutral enough to work with various design styles. Navy blue and forest green have become increasingly popular for creating dramatic, sophisticated looks, particularly when paired with brass or gold hardware.
The Preparation Process: Proper preparation is crucial for achieving professional-looking results. Begin by removing all cabinet doors and drawers, labeling each piece to ensure easy reassembly. Remove all hardware and clean all surfaces thoroughly with a degreasing cleaner to remove cooking residue and oils that could interfere with paint adhesion.
Sanding is a critical step that cannot be skipped. Use 150-grit sandpaper to lightly sand all surfaces, creating a slightly rough texture that helps the primer adhere properly. Pay special attention to areas with heavy buildup or glossy finishes. After sanding, wipe down all surfaces with a tack cloth to remove dust particles.
Priming and Painting Techniques: Apply a high-quality bonding primer designed for kitchen cabinets. This step is essential for ensuring proper paint adhesion and preventing bleed-through from the original finish. Use a high-quality angled brush for detailed areas and a small foam roller for larger flat surfaces to achieve a smooth, even finish.
When applying the topcoat, use thin, even coats rather than trying to achieve full coverage in a single application. Two to three thin coats will provide better coverage and a more professional appearance than one thick coat. Allow each coat to dry completely before applying the next, and lightly sand between coats with 220-grit sandpaper for the smoothest possible finish.
Professional Tips for Success: Work in a dust-free environment whenever possible, as dust particles can settle on wet paint and create an uneven finish. Consider setting up a temporary spray booth in your garage using plastic sheeting to create a controlled environment. Maintain consistent temperature and humidity levels during the painting process, as extreme conditions can affect how the paint flows and dries.
Take your time with the process – rushing will only lead to mistakes that require additional time to fix. Plan for the project to take several days or even weeks if you’re working around your schedule, as proper drying time between coats is essential for durability.
2. Update Cabinet Hardware for Instant Modernization
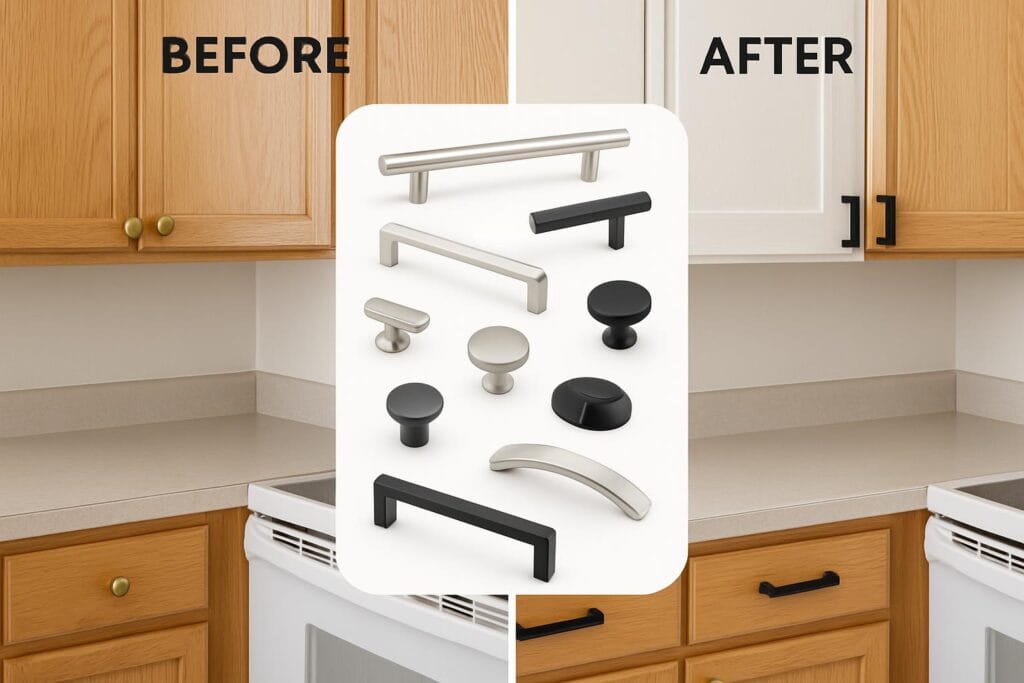
Updating cabinet hardware is one of the quickest and most affordable ways to modernize your kitchen’s appearance. This simple change can transform the entire character of your space, taking it from traditional to contemporary, rustic to refined, or dated to current. The best part is that this upgrade can typically be completed in a single afternoon with basic tools.
Understanding Hardware Styles: Cabinet hardware comes in countless styles, finishes, and configurations. Pulls are typically used on drawers and larger cabinet doors, while knobs work well on smaller doors and can be used throughout for a cohesive look. The current trend leans toward longer pulls (4-6 inches) for a more contemporary appearance, while traditional styles often feature smaller pulls and round knobs.
Consider the scale of your cabinets when selecting hardware. Larger cabinets can handle more substantial hardware, while smaller cabinets look better with proportionally smaller pieces. The style of your kitchen should also influence your choice – sleek, minimalist hardware works well in modern kitchens, while more ornate pieces complement traditional designs.
Finish Selection: Hardware finishes can dramatically impact your kitchen’s overall aesthetic. Brushed nickel and stainless steel offer timeless appeal and work well with most color schemes. Matte black has become increasingly popular for its bold, contemporary look and ability to make a statement. Brass and gold finishes are experiencing a resurgence, particularly in kitchens with warm color palettes.
Consider coordinating your hardware finish with other elements in your kitchen, such as faucets, light fixtures, and appliances. While everything doesn’t need to match exactly, maintaining a cohesive metal palette creates a more polished, intentional look.
Installation Considerations: Before purchasing new hardware, measure your existing pieces and note the hole spacing. If your new hardware matches the existing hole pattern, installation is straightforward. However, if you’re changing styles or sizes, you may need to drill new holes and fill the old ones.
When drilling new holes, use a drill bit specifically designed for the material you’re working with, and always drill from the front of the door to prevent splintering. A template or jig can help ensure consistent placement across all cabinets.
Budget-Friendly Shopping Tips: Hardware costs can add up quickly, especially in larger kitchens. Look for sales at home improvement stores, consider purchasing in bulk for better pricing, or explore online retailers for competitive prices. You don’t always need to buy the most expensive options – many mid-range hardware pieces offer excellent quality and appearance at a fraction of the cost of high-end designer pieces.
Consider mixing and matching different pieces from the same collection to add visual interest while maintaining cohesion. For example, you might use longer pulls on drawers and shorter pulls on doors, or combine pulls and knobs in a thoughtful way.
3. Add a Stunning Backsplash
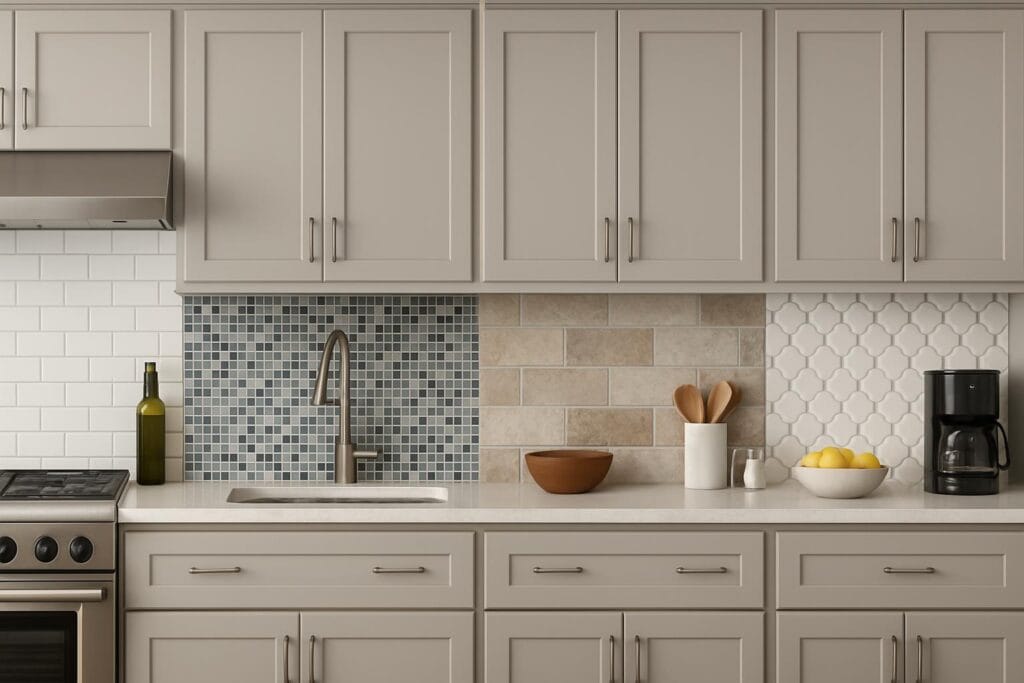
A backsplash serves both functional and aesthetic purposes in the kitchen, protecting walls from splashes and spills while providing an opportunity to add color, texture, and personality to your space. Installing a new backsplash can dramatically transform your kitchen’s appearance and is a project that many homeowners can tackle themselves with the right preparation and tools.
Material Options and Costs: Subway tiles remain a popular choice for their timeless appeal and versatility. These rectangular tiles can be installed in various patterns – traditional brick layout, herringbone, or vertical stack – to create different visual effects. Costs typically range from 3to3 to 3to10 per square foot for materials.
Mosaic tiles offer endless design possibilities with materials ranging from glass and ceramic to natural stone and metal. These smaller tiles can create intricate patterns and add significant visual interest to your kitchen. Expect to pay 5to5 to 5to15 per square foot for mosaic materials.
Natural stone options like marble, travertine, or slate provide elegant, sophisticated looks but require more maintenance and sealing. Costs range from 8to8 to 8to25 per square foot depending on the stone type and quality.
For budget-conscious homeowners, peel-and-stick tiles have improved dramatically in recent years. High-quality options can closely mimic the appearance of ceramic or stone tiles at a fraction of the cost, typically 1to1 to 1to5 per square foot. While not as durable as traditional tiles, they’re perfect for renters or those wanting a temporary update.
Design Considerations: The backsplash should complement your existing countertops and cabinets while adding visual interest without overwhelming the space. Light-colored backsplashes can make small kitchens appear larger, while darker options can add drama and sophistication to larger spaces.
Consider the grout color carefully, as it can significantly impact the final appearance. Matching grout creates a seamless look, while contrasting grout emphasizes the tile pattern and adds visual texture.
Installation Process: Proper preparation is essential for a successful backsplash installation. Clean the wall surface thoroughly and ensure it’s level and smooth. Mark your starting point carefully, typically the center of the most visible wall, and work outward to ensure balanced tile placement.
Use appropriate adhesive for your chosen tile material and wall surface. Apply adhesive evenly with a notched trowel, working in small sections to prevent it from drying before tiles are placed. Use tile spacers to maintain consistent gaps between tiles.
Maintenance and Longevity: Different backsplash materials require varying levels of maintenance. Ceramic and porcelain tiles are virtually maintenance-free, while natural stone may require periodic sealing. Glass tiles are easy to clean but may show water spots more readily.
Proper installation and quality materials will ensure your backsplash remains beautiful and functional for many years. Even budget-friendly options can provide excellent longevity when installed correctly and maintained properly.
4. Improve Kitchen Lighting
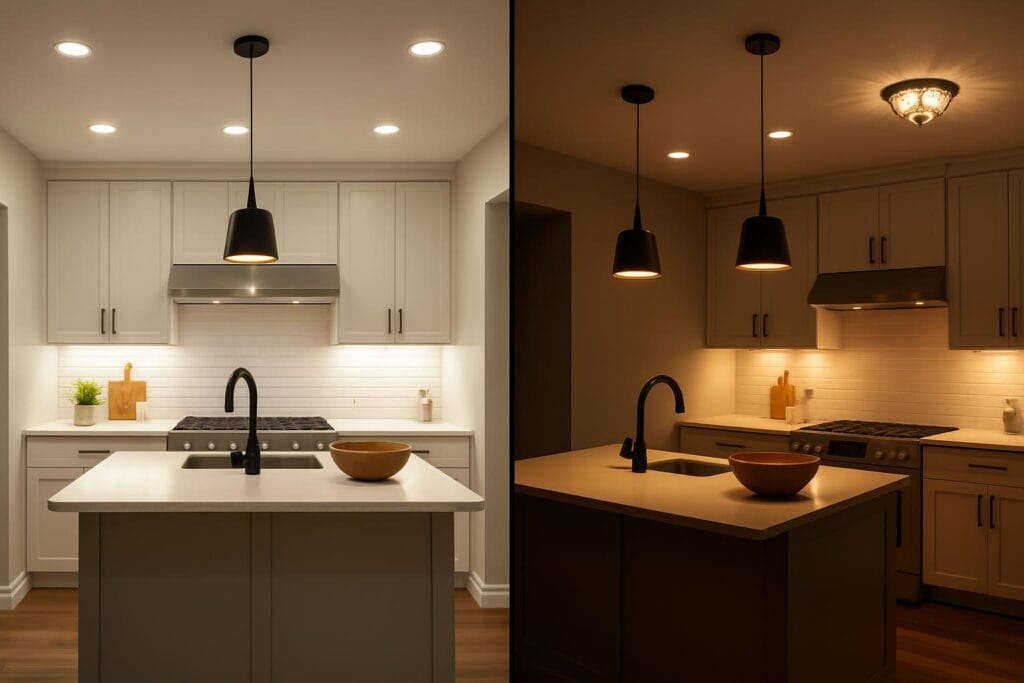
Lighting plays a crucial role in both the functionality and ambiance of your kitchen, yet it’s often overlooked in favor of more visible upgrades. Poor lighting can make even the most beautiful kitchen feel unwelcoming and difficult to work in, while well-planned lighting can transform an ordinary space into something truly special. The good news is that lighting upgrades can be accomplished on a budget and often provide immediate, dramatic results.
Understanding Kitchen Lighting Layers: Effective kitchen lighting incorporates three distinct layers: ambient, task, and accent lighting. Ambient lighting provides overall illumination for the space, typically through ceiling-mounted fixtures or recessed lights. Task lighting focuses on specific work areas like countertops, islands, and sinks where detailed activities take place. Accent lighting highlights architectural features, artwork, or decorative elements while adding visual interest and depth to the space.
Under-Cabinet Lighting: Installing under-cabinet lighting is one of the most impactful and affordable lighting upgrades you can make. LED strip lights or puck lights mounted beneath upper cabinets eliminate shadows on countertops, making food preparation safer and more enjoyable. Modern LED options are energy-efficient, long-lasting, and available in various color temperatures to match your preferences.
Battery-operated options are available for those who want to avoid electrical work, though hardwired systems provide more reliable, long-term solutions. Many LED strips come with dimming capabilities, allowing you to adjust the brightness for different activities or times of day.
Pendant Lighting: Pendant lights over kitchen islands or peninsulas provide both task lighting and visual appeal. These fixtures come in countless styles, from industrial and modern to traditional and farmhouse, allowing you to reinforce your kitchen’s design aesthetic while improving functionality.
When selecting pendant lights, consider the scale of your island and the height of your ceilings. Generally, pendants should hang 30-36 inches above the island surface, and multiple pendants should be spaced evenly with consistent heights.
Recessed Lighting: Adding recessed lights can provide excellent ambient lighting while maintaining a clean, uncluttered ceiling appearance. While installation typically requires some electrical work, the impact on your kitchen’s overall lighting quality can be substantial.
Plan recessed light placement carefully to avoid shadows and ensure even illumination. A general rule is to space lights approximately 4-6 feet apart, but this can vary based on ceiling height and room size.
Budget-Friendly Options: Many lighting upgrades can be accomplished without major electrical work. Battery-operated LED lights, plug-in pendant lights, and track lighting systems offer flexibility and easier installation. Smart bulbs can add dimming and color-changing capabilities to existing fixtures without rewiring.
Consider updating existing light fixtures with new shades, bulbs, or decorative elements before replacing them entirely. Sometimes a simple bulb upgrade from warm incandescent to bright LED can dramatically improve your kitchen’s lighting quality.
5. Simple Countertop Makeovers
Countertops are one of the most prominent features in any kitchen, and outdated or damaged surfaces can significantly impact the overall appearance of your space. While replacing countertops entirely can be expensive, ranging from 2,000to2,000 to 2,000to8,000 or more, several budget-friendly options can give your existing countertops a fresh new look without the cost and disruption of full replacement.
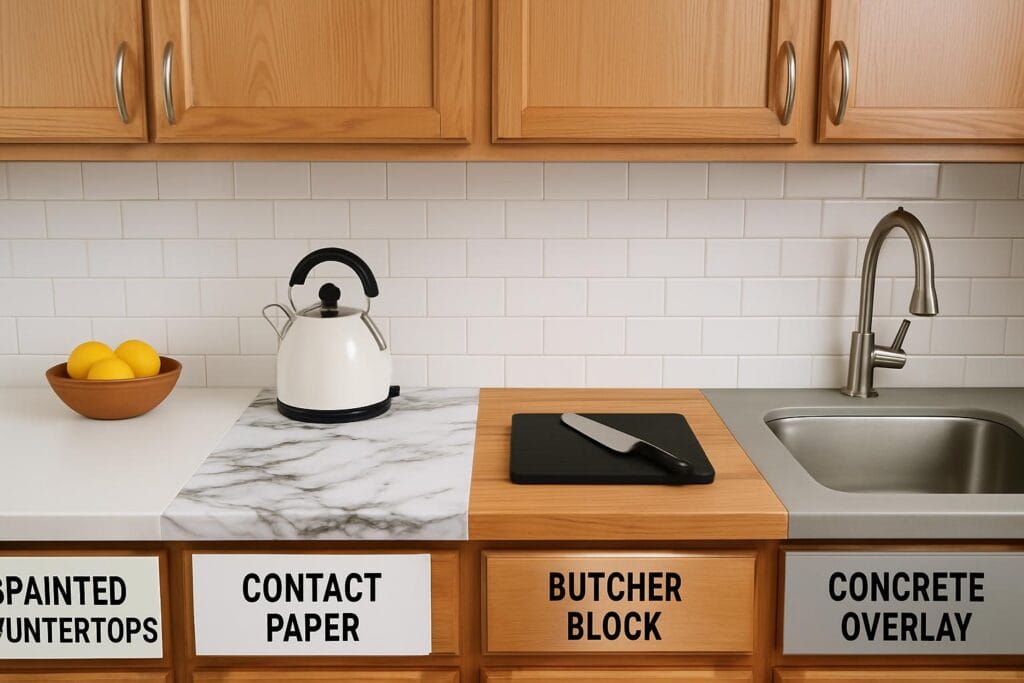
Painted Countertops: Painting countertops has become increasingly popular as paint technology has improved. Specialized countertop paints and epoxy coatings can transform laminate, tile, or even concrete surfaces into attractive, durable work surfaces that mimic the appearance of stone or other premium materials.
The process typically involves thorough cleaning and light sanding, followed by primer application and multiple coats of specialized paint. Some systems include decorative chips or additives that create texture and visual interest. While painted countertops require careful maintenance and may not be as durable as stone surfaces, they can provide an attractive solution for budget-conscious homeowners.
Expect the entire process to take several days due to drying time between coats, and plan to keep your kitchen out of commission during this period. Costs typically range from 100to100 to 100to300 for materials, making this one of the most affordable countertop upgrade options.
Contact Paper and Vinyl Wraps: High-quality contact paper and vinyl wraps have evolved significantly from the basic options of the past. Modern products can closely mimic the appearance of marble, granite, wood, and other premium materials while providing a temporary or semi-permanent solution for updating countertops.
Installation involves careful measurement, cutting, and application to ensure smooth, bubble-free results. While this option requires patience and attention to detail, it’s completely reversible and can be an excellent choice for renters or those planning future renovations.
Quality varies significantly among products, so invest in higher-grade materials for better appearance and durability. Expect to pay 50to50 to 50to200 for materials depending on your kitchen size and the quality of products chosen.
Butcher Block Overlays: Adding a wood butcher block overlay to existing countertops can create a warm, natural appearance while providing a functional work surface. This option works particularly well over tile or laminate countertops and can be customized to fit your exact dimensions.
Butcher block requires regular maintenance including periodic oiling and sanding, but it can be repaired and refinished as needed. This option typically costs 200to200 to 200to600 depending on the wood species and kitchen size.
Concrete Overlays: Concrete overlays can transform existing countertops into modern, industrial-style surfaces. This technique involves applying a thin layer of concrete over the existing surface, which can then be stained, stamped, or textured to create various appearances.
While more involved than other options, concrete overlays can provide extremely durable, heat-resistant surfaces that can be customized with integral colors, decorative aggregates, or stamped patterns. Costs typically range from 300to300 to 300to800 for materials and tools.
Tile Overlays: Installing new tile over existing countertops can provide a completely new look while utilizing existing substrate. This option works well over laminate or tile surfaces and allows for creative design possibilities with different tile sizes, patterns, and materials.
Consider using larger tiles to minimize grout lines, which can be difficult to keep clean in kitchen environments. Subway tiles, natural stone, or large-format porcelain tiles all work well for this application.
6. Maximize Storage and Organization
Improving storage and organization in your kitchen doesn’t just make the space more functional – it can also make it appear larger, cleaner, and more inviting. Many storage upgrades can be accomplished on a modest budget while providing significant improvements to your daily cooking experience.
Cabinet Interior Upgrades: The interior of your existing cabinets likely has untapped potential for improved storage and organization. Pull-out shelves can transform deep, hard-to-reach cabinets into easily accessible storage spaces. These can be purchased as complete units or built as DIY projects using drawer slides and plywood.
Lazy Susans are excellent for corner cabinets, making items stored in the back easily accessible. Door-mounted organizers can hold spices, cleaning supplies, or other small items while utilizing otherwise wasted space.
Drawer dividers and organizers can transform cluttered drawers into efficient storage systems for utensils, gadgets, and other kitchen tools. Many options are adjustable and can be customized to fit your specific needs and drawer dimensions.
Pantry Organization: A well-organized pantry can make your entire kitchen feel more functional and spacious. Clear storage containers not only keep food fresh longer but also make it easy to see what you have and when items need to be restocked.
Shelf risers can double your storage capacity by creating two levels of storage on existing shelves. Over-the-door organizers can hold spices, snacks, or cleaning supplies while utilizing otherwise wasted space.
Label everything clearly to maintain organization and help family members find and return items to their proper places. A label maker or simple adhesive labels can make a significant difference in maintaining your organizational system.
Open Shelving: Replacing some upper cabinets with open shelving can make your kitchen feel larger and more open while providing display space for attractive dishes, glassware, or decorative items. This option is particularly effective in smaller kitchens where upper cabinets can feel overwhelming.
Open shelving requires more maintenance than closed cabinets, as items are exposed to dust and cooking residue. However, it encourages you to keep only attractive, frequently used items on display while storing less attractive necessities in closed storage.
Vertical Storage Solutions: Utilize vertical space with tall, narrow storage units that can fit between appliances or in unused corners. Magnetic strips can hold knives and metal utensils on walls or the sides of appliances. Pegboards can be customized with hooks and shelves to hold pots, pans, and tools while adding visual interest to your walls.
7. Add Decorative Elements and Finishing Touches
The final layer of your kitchen transformation involves adding decorative elements and finishing touches that reflect your personal style and make the space feel complete and welcoming. These details often require minimal investment but can have a significant impact on the overall appearance and feel of your kitchen.
Window Treatments: Kitchen windows present opportunities to add color, pattern, and texture while controlling light and privacy. Simple cafe curtains, Roman shades, or valances can soften the hard lines of cabinetry and appliances while adding visual interest.
Choose fabrics that can withstand kitchen humidity and are easy to clean. Avoid long curtains near cooking areas for safety reasons, and consider treatments that can be easily removed for washing.
Decorative Hardware: Beyond functional cabinet hardware, consider adding decorative elements like crown molding, trim, or applique details to plain cabinet doors. These additions can make stock cabinets appear more custom and expensive while adding architectural interest to your kitchen.
Decorative brackets can support open shelving while adding visual appeal. Choose styles that complement your overall design aesthetic, whether traditional, modern, or transitional.
Color and Pattern: Introduce color and pattern through accessories like dish towels, placemats, artwork, or small appliances. These elements can be changed seasonally or as your tastes evolve, providing flexibility in your design scheme.
Consider a cohesive color palette that includes 2-3 main colors plus neutrals. This approach creates visual harmony while allowing for variety in textures and patterns.
Plants and Natural Elements: Fresh herbs, small potted plants, or cut flowers can bring life and freshness to your kitchen while providing functional benefits. Herbs like basil, rosemary, or mint can be used in cooking while adding natural beauty to your space.
Consider the light requirements of any plants you choose, and select varieties that can thrive in kitchen conditions with varying humidity and temperature levels.
Artwork and Personal Touches: Kitchen-appropriate artwork can add personality and visual interest to your walls. Consider pieces that can withstand humidity and occasional splashing, such as framed prints under glass or metal wall sculptures.
Personal touches like family photos, collections, or handmade items can make your kitchen feel uniquely yours while creating conversation pieces for guests.
Frequently Asked Questions
How much should I budget for a complete kitchen refresh using these methods?
A comprehensive kitchen refresh using all seven methods typically costs between 1,500and1,500 and 1,500 and 4,000, depending on your kitchen size and the quality of materials chosen. This is significantly less than a full renovation, which can cost 15,000 to 15,000 to 15,000 to 50,000 or more. You can spread these upgrades over time to manage costs and prioritize the changes that will have the biggest impact.
Which upgrade provides the best return on investment?
Painting cabinets typically provides the highest return on investment, often recouping 70-80% of the cost when selling your home. Cabinet hardware updates and improved lighting also offer excellent returns while being relatively inexpensive to implement.
Can I do these upgrades myself, or do I need professional help?
Most of these upgrades can be completed by motivated DIYers with basic tools and skills. Painting cabinets, updating hardware, and adding decorative elements are well within most homeowners’ capabilities. Electrical work for lighting upgrades may require professional installation depending on local codes and your comfort level.
How long do these budget upgrades typically last?
With proper preparation and quality materials, painted cabinets can last 5-10 years or more. Hardware updates can last decades. Backsplashes, when properly installed, can last 15-20 years. The longevity depends largely on the quality of materials used and the care taken during installation.
What’s the best order to complete these upgrades?
Start with any electrical work (lighting), followed by painting cabinets, installing backsplashes, updating hardware, and finishing with decorative elements. This order minimizes the risk of damaging completed work and allows for the most efficient workflow.
Are peel-and-stick backsplash tiles worth considering?
High-quality peel-and-stick tiles have improved significantly and can be an excellent budget option, especially for renters or temporary updates. While not as durable as traditional tiles, they’re easy to install and remove, making them perfect for testing design ideas or creating temporary improvements.
How do I choose paint colors that won’t look dated quickly?
Stick with classic, neutral colors like white, cream, light gray, or soft beige for the most timeless appeal. These colors work with various design styles and can be updated with colorful accessories as trends change. Avoid trendy colors for large surfaces like cabinets.
Can I mix different hardware finishes in my kitchen?
Yes, mixing finishes can add visual interest, but do so thoughtfully. A common approach is to use one finish for cabinet hardware and another for plumbing fixtures and lighting. Limit yourself to 2-3 finishes maximum to maintain cohesion.
What’s the most common mistake people make with budget kitchen upgrades?
The biggest mistake is skipping proper preparation, especially when painting cabinets. Rushing through cleaning, sanding, and priming steps will result in poor adhesion and a finish that won’t last. Take time to do the prep work correctly for professional-looking results.
How can I make my small kitchen look larger with these upgrades?
Use light colors for cabinets and backsplashes, improve lighting with under-cabinet and ambient fixtures, consider open shelving instead of some upper cabinets, and use larger tiles or minimal grout lines in backsplashes to create fewer visual breaks.
Should I update my appliances as part of these upgrades?
While new appliances aren’t included in these budget upgrades, you can often improve their appearance with appliance paint designed for this purpose, or by adding decorative panels to dishwashers to match your cabinets. Focus on the structural elements first, then consider appliance updates later.
How do I ensure my upgrades will appeal to potential buyers if I sell?
Stick with neutral colors and classic styles that have broad appeal. Avoid highly personal or trendy choices that might not suit other tastes. Focus on improvements that enhance functionality as well as appearance, as these provide the best value for both daily living and resale.

